Stage 3 tasks
Work through the steps in order. If something breaks, compare your blocks to the video.
Video 1 — Time 07:02Open at 07:02 ↗
How to use the videos (do this every stage):
You cannot watch the whole video and remember every step. Instead: watch ~30 seconds, pause, then build that section in Scratch. Repeat.
- Split your screen so you can see Scratch and the video at the same time.
- Windows: open Scratch and the worksheet/video, then press Windows key + Left Arrow to snap one app to the left. Click the other window to fill the right.
- If you want Scratch bigger: drag the divider so Scratch takes about 2/3 of the screen and the video takes 1/3.
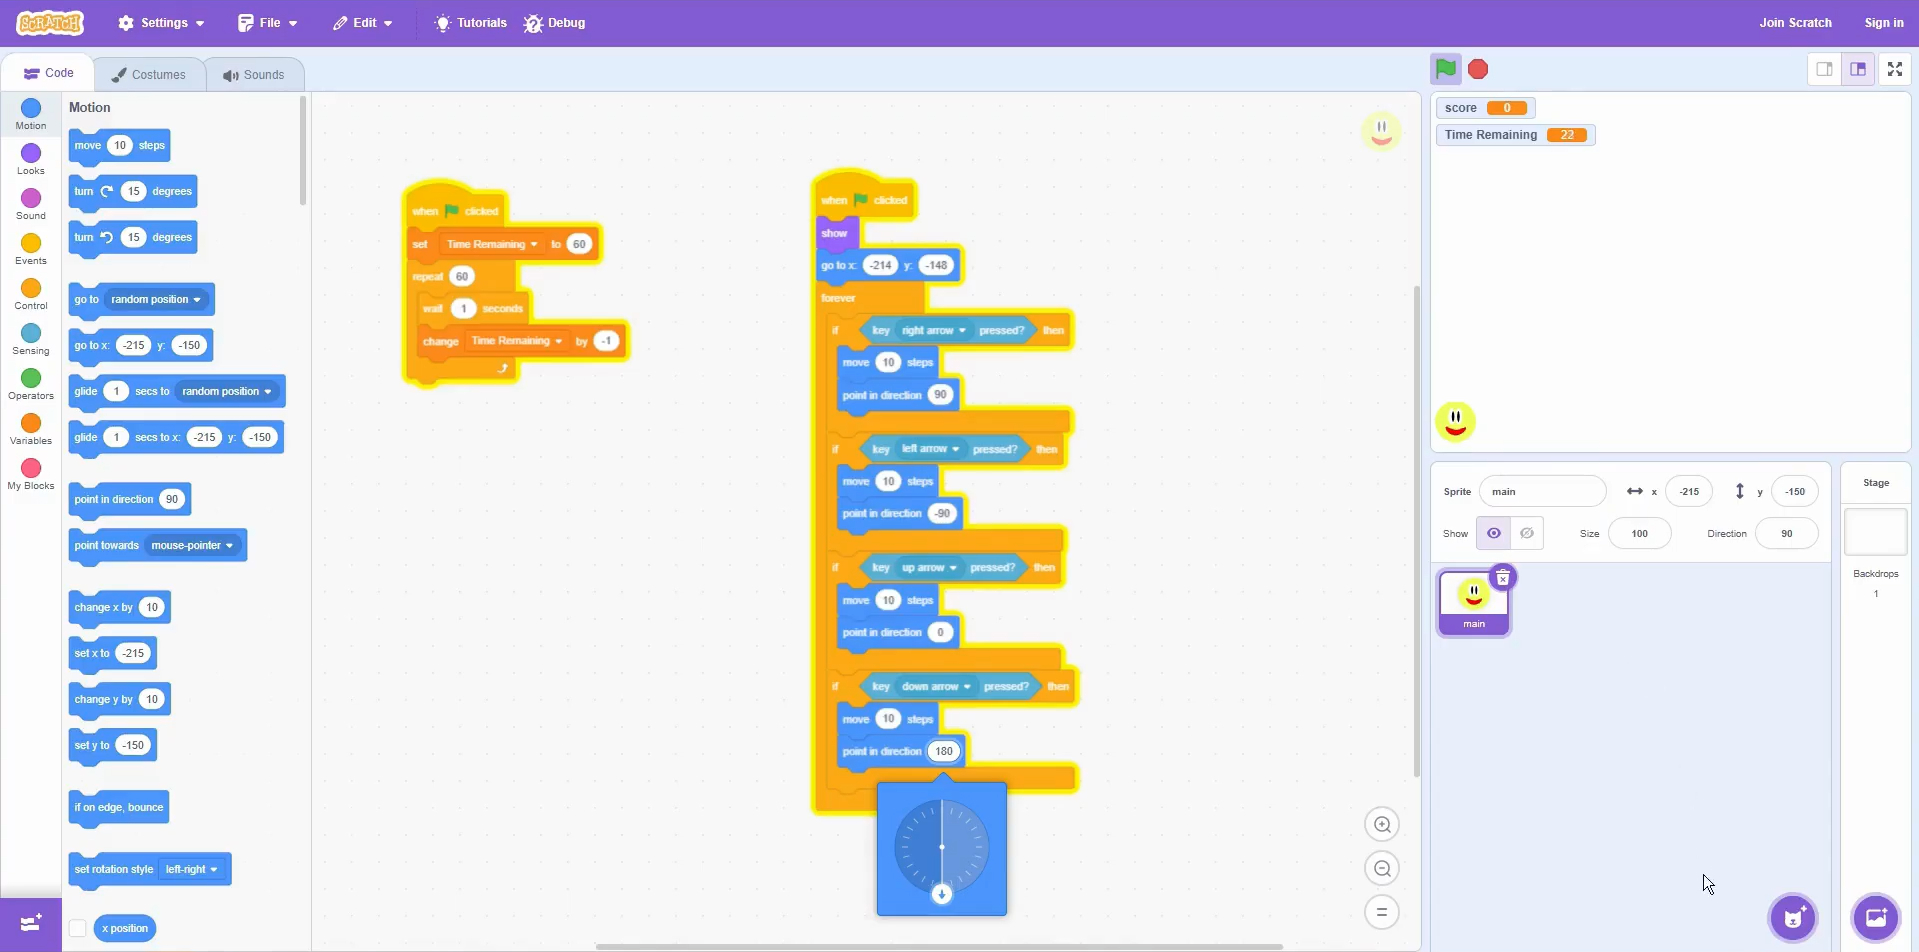
Make sure Main always appears and starts in the right place
- Events → when green flag clicked
- Looks → show
- Motion → set a start point using go to x: y:
Add the movement loop
- Control → forever
- Inside forever: if
- Sensing → key [right arrow] pressed?
- Motion → point 90 then move 10 steps
- Duplicate for left (-90), up (0), down (180).
Quick check (it works if…)
- Main moves smoothly when you hold the arrow keys.
- Main changes direction correctly (faces the way it moves).
Extension:
- Change the move amount from 10 to 6 if it feels too fast.
- Add boundaries so Main can’t leave the screen (advanced).
Scratch tips for this stage:
- Put your movement checks inside a forever loop so the keys work all game.
- Duplicate your if block to make left/up/down quicker, then change the key + direction.
- If movement feels too fast, reduce move steps (e.g., 6).